My shopping cart
Your cart is currently empty.
Continue ShoppingLast Updated: October 17, 2026
Microcement installation demands precision, experience, and access to reliable technical support for microcement installers when problems arise. Unlike standard flooring systems, microcement requires understanding substrate conditions, application timing, curing protocols, and finishing techniques that can make or break a project.
At DF Studio NYC, we recognize that technical support for microcement installers goes beyond product specifications. It encompasses substrate assessment, layer-by-layer application guidance, troubleshooting on the jobsite, and access to technical documentation that installers can reference mid-project.
This guide covers the core areas where microcement installers need technical assistance: substrate preparation, material selection, application procedures, troubleshooting common defects, and accessing resources that keep projects on track. We'll walk through what to assess before installation begins, how to diagnose problems when they occur, and where to find the technical expertise your team needs.
Substrate failure is the leading cause of microcement installation problems. Before a single coat goes down, the surface beneath must be properly evaluated and prepared. This is where technical support for microcement installers begins, not during application, but before the first primer touches the floor.
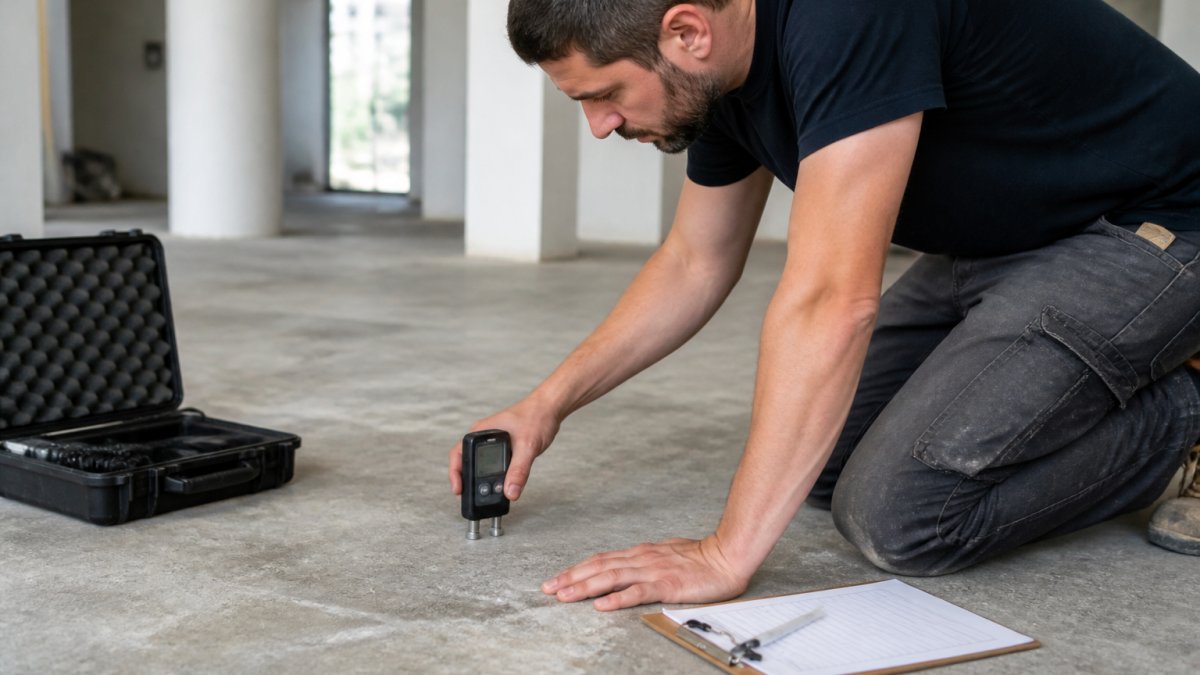
Microcement bonds to concrete, tile, stone, and masonry, but each substrate behaves differently. A concrete slab that looks solid may have hidden issues: trapped moisture, weak surface layers, or incompatible sealants from previous finishes.
Contractors should evaluate substrate hardness using a simple scratch test: a fingernail should not easily scratch the surface. If it does, the substrate is too weak and requires grinding or a bonding agent. Check for loose material, dust, or efflorescence, white mineral deposits that indicate moisture movement. These must be removed before priming.
For existing tile, assess whether the tiles are properly adhered. Tap the surface with a rubber mallet; hollow sounds indicate voids beneath the tile. These areas will fail under microcement weight and foot traffic. The substrate must be stable, clean, and properly profiled for microcement to perform.
Moisture is microcement's primary enemy. Trapped water beneath the surface causes adhesion loss, bubbling, and delamination weeks or months after installation. Testing moisture before installation is non-negotiable.
Use a calcium chloride or relative humidity meter to measure moisture content in concrete. Most microcement systems require moisture levels below 3 pounds per 1,000 square feet per 24 hours (MVER, moisture vapor emission rate). If readings exceed this, the substrate must be remediated before installation proceeds.
Remediation options include:
Skipping moisture remediation is the fastest path to project failure. Technical support for microcement installers must include clear guidance on moisture thresholds and remediation timelines specific to the system being used.
Professional-grade tools separate successful installations from failed ones. Microcement requires specific equipment that differs from standard concrete or tile tools. Contractors should invest in proper tools rather than improvising with generic alternatives.
Essential tools include:
Materials matter equally. Primers bond microcement to the substrate; using the wrong primer or applying it improperly undermines the entire system.
HeyDecco primers like HeyDecco Primer Grip - Ready to Use offer ready-to-use convenience, reducing mixing errors and application inconsistency. For projects requiring maximum adhesion, the SEMCO Microcement Decorative Finish Kit includes all components needed for complete system installation.

Cutting corners on materials or tools creates problems that appear later. Technical support for microcement installers must address material selection upfront to prevent installation failures caused by incompatible or substandard products.
Microcement installation is a multi-step process. Each layer, primer, base coats, finish coats, has specific application requirements and curing times. Rushing between layers or applying in incorrect conditions causes adhesion failure, color variation, and surface defects.
The primer creates the bond between substrate and microcement. Application thickness and coverage are critical. Most primers are applied at 200-250 microns (roughly 0.008-0.010 inches). Too thin, and adhesion fails.
Primer must be applied to a clean, dry substrate. Any dust, moisture, or contamination prevents proper bonding. After primer application, allow the specified curing time, typically 4-24 hours depending on humidity and temperature, before applying base coats.
Base coats provide thickness and structural foundation for finish coats. Most systems require two base coat layers, each 2-3 mm thick. Application technique matters: use long, overlapping strokes with consistent pressure.
Curing between base coats typically takes 24 hours at 70°F with 50% relative humidity. Temperature and humidity directly affect cure time. Cold, humid conditions slow curing significantly. Installers must account for jobsite conditions and adjust timelines accordingly.
Finish coats determine the final appearance and protective properties of microcement. These are thinner than base coats, typically 1-1.5 mm, and require more refined application technique. Trowel angle, pressure, and direction all influence the final texture and sheen.
Microcement curing time for finish coats is typically 48-72 hours before light foot traffic and 7-14 days before full use (furniture, cleaning, heavy traffic). This timeline assumes normal temperature and humidity.
A common installation mistake is opening the space to traffic before full cure. Partial cure leaves the surface vulnerable to indentation, scuffing, and adhesion loss.
Temperature and humidity during curing affect final hardness and adhesion. Ideal conditions are 68-77°F with 40-60% relative humidity. Extreme conditions (below 50°F or above 85°F, or humidity below 30% or above 80%) compromise cure quality.
Problems arise despite best efforts. Knowing how to diagnose and address defects separates experienced contractors from those who panic and call for complete removal and reinstallation.
Adhesion failure appears as bubbling, delamination, or separation between layers. This typically results from substrate moisture, improper primer application, or contamination between layers.
Diagnosis: Tap the surface with a rubber mallet. Hollow sounds indicate voids. Press on the edge of a delaminated area; if it flexes or lifts, adhesion has failed.
SEMCO Microcement Decorative Finish Kit →
Resolution:
Cracking typically appears as fine hairline cracks or, in severe cases, larger structural cracks. Causes include:
Fine hairline cracks (hairline width) are often cosmetic and can be sealed with topcoat sealer. Larger cracks indicate structural issues and may require substrate assessment and repair before microcement is reapplied.
Color inconsistency appears as patches, streaks, or overall variation across the surface. Causes include:
Prevention is more effective than correction. Mix batches thoroughly and consistently. Apply primer uniformly. Use consistent trowel technique across the entire surface. If color variation occurs, the affected area must be recoated with matching microcement to blend.
Surface defects like orange peel texture, trowel marks, or rough patches result from application technique errors. These are largely cosmetic but affect the finished appearance. Light sanding and sealing can sometimes minimize visible defects, but prevention through proper technique is the best approach.
Microcement requires sealing to protect against staining, moisture, and wear. Sealers also enhance color and provide the final aesthetic finish.
Water-based sealers offer low VOC and easy application but provide moderate protection. Solvent-based sealers deliver superior stain resistance and durability but require proper ventilation during application. Polyurethane sealers combine durability with water resistance.
Application typically requires two coats. Allow full cure (24-48 hours) before exposing the surface to water or traffic.
Repairs to sealed microcement are possible but require careful technique. Small chips or damage can be addressed by grinding the affected area, cleaning, priming, and patching with matching microcement.
For significant damage, professional restoration may be necessary. This is where technical support for microcement installers becomes invaluable, knowing when to attempt repair versus when to call in specialists prevents costly mistakes.
Successful microcement installation begins with planning. Contractors need clear project requirements, system selection guidance, and access to technical documentation before work begins.
Define project scope: square footage, substrate type, desired finish, traffic level, and timeline. Each factor influences material selection and installation approach.
High-traffic areas require more durable base coats and sealers. Wet areas (kitchens, bathrooms) demand moisture-resistant primers and water-resistant sealers. Decorative finishes may require additional finish coats or specialized application techniques.
System selection depends on these factors. The SEMCO X-Bond system suits residential projects. The SEMCO Decorative Finish Kit addresses projects requiring premium appearance and finish options. HeyDecco primers support both systems and offer flexibility for varied substrate conditions.

Communicate project requirements to material suppliers. DF Studio NYC provides system recommendations based on your specific project parameters.
Technical manuals, installation guides, and safety data sheets are essential resources.
Access technical documentation before installation begins. Review application procedures, curing schedules, and environmental requirements. Confirm that your jobsite conditions meet system specifications.
Contact technical support when questions arise. DF Studio NYC provides technical guidance to contractors working with our microcement systems. Describe your substrate, environmental conditions, and specific concerns.
Contractor training programs offered by material manufacturers provide hands-on experience and certification.
Professional networks and industry associations connect contractors with peers facing similar challenges. Forums, webinars, and local contractor groups offer real-world insights and troubleshooting advice.
| Resource Type | Best For | Access Method |
|---|---|---|
| Technical manuals | Specifications, mixing ratios, curing times | Product packaging or supplier website |
| Installation guides | Step-by-step application procedures | Manufacturer documentation |
| Troubleshooting resources | Diagnosing and resolving defects | Technical support hotline or online portal |
| Contractor training | Hands-on skill development and certification | Manufacturer training programs |
| Professional networks | Peer advice and industry best practices | Local associations, online forums |
Microcement installation success depends on preparation, technique, and access to reliable technical support for microcement installers when problems arise. Substrate assessment prevents adhesion failure before it starts.
DF Studio NYC supplies the materials contractors need, primers, base coats, and finish systems engineered for reliable performance.
Inadequate substrate preparation is the leading cause of microcement failure. Moisture, dust, loose material, and poor adhesion between the substrate and primer compromise the entire system. Before applying microcement, test moisture levels, clean thoroughly, and confirm the substrate is structurally sound. Using a quality primer like HeyDecco Primer Grip ensures proper bonding and prevents adhesion problems that can lead to cracking or peeling.
Microcement curing time varies by product and environmental conditions. Most systems require 7-14 days of full cure before sealing is recommended, though light foot traffic may be possible after 48-72 hours. Temperature, humidity, and ventilation affect curing speed. Always consult the technical documentation for your specific microcement system. Rushing the curing process or sealing too early can trap moisture and cause failure.
Essential microcement installation tools include trowels (notched and finishing), mixing equipment, moisture meters, primer rollers, surface preparation grinders, and protective equipment. The SEMCO X-Bond Microcement System Starter Kit ($249.89) includes core materials needed to begin projects. Invest in quality application tools, cheap trowels create uneven surfaces and require rework. Proper tools reduce installation time and improve finish quality.
Adhesion issues typically stem from inadequate primer coverage, contaminated surfaces, or incompatible substrate materials. Stop work immediately and inspect the substrate. Clean any dust or loose material, reapply primer if coverage is incomplete, and allow proper drying time. If adhesion failure occurs after application, the affected area must be removed and reapplied. Prevention through proper substrate preparation and primer application is far more efficient than correcting failures after the fact.