My shopping cart
Your cart is currently empty.
Continue ShoppingLast Updated: October 18, 2026
Installing a European door requires different techniques than standard North American installations. European doors come with tighter tolerances, different hinge systems, and specific frame assembly methods. At DF Studio NYC, we work with contractors and homeowners who need precision European door installation guidance. Understanding these differences upfront saves time, prevents costly mistakes, and ensures your door operates smoothly for years.

Interior European doors differ from exterior doors in frame thickness, weathersealing requirements, and hardware specifications. Interior doors typically use single-action hinges and don't require weatherstripping or threshold seals.
The choice affects your entire installation approach. An interior door installation focuses on alignment and smooth operation. According to U.S. Department of Energy building envelope standards, proper weathersealing around exterior doors reduces heating and cooling costs by preventing air leakage.
Single European doors fit standard openings and install quickly. Double doors (French doors) require wider openings, dual hinges, and coordinated alignment. Single doors work well for bedrooms and closets. Double doors suit living areas and exterior transitions where light and flow matter.
Double door installation takes longer because both panels must align perfectly. Misalignment causes binding, uneven gaps, and operational problems. Single doors forgive minor frame irregularities better than doubles do. Most residential installations use single doors for simplicity.
A prehung door set arrives with the frame pre-assembled and the door already hung on hinges. This eliminates frame assembly work and speeds installation significantly. A door leaf is just the door panel. You build the frame from components and hang the door yourself.
Prehung sets work best when your opening matches standard dimensions exactly. Door leaves offer flexibility when your opening is non-standard or when you're replacing an existing frame. Prehung sets cost more upfront but reduce labor time.
Accurate measurement prevents expensive mistakes. European doors use metric measurements on the frame components but your rough opening dimensions stay in inches. Measure twice. Verify all measurements before ordering.

Start with the rough opening, which is the framed hole in your wall before the door frame installs. Measure the width at three heights: top, middle, and bottom. Measure the height at three points: left side, center, and right side.
Use a metal tape measure, not a cloth one. Metal tapes stay straight and accurate. Write down every measurement. Take photos of your opening from multiple angles. These photos help when ordering or troubleshooting problems later.
Plumb means perfectly vertical. Square means corners form 90-degree angles. Most existing openings are slightly out of plumb or square. European doors tolerate small deviations but not large ones.
Use a 4-foot level to check plumb on both sides of the opening. Place the level vertically against the left jamb, then the right jamb. The bubble should stay centered. Check for square by measuring diagonally corner to corner. Both diagonals should measure the same length.
Remove the old door and frame completely before starting. Leftover frame pieces create installation problems and prevent proper weathersealing on exterior doors.
Unlock and open the door fully. Remove hinge pins by tapping a nail upward through the bottom of each hinge. The door lifts away once all pins are out. Set the door aside safely.
Remove the frame by cutting through fasteners with a reciprocating saw. Cut along the inside edges where the frame meets the wall studs. Pry the frame out with a pry bar. Remove all fasteners, shims, and old caulk from the opening.
Look for rot, water damage, or structural issues. Press the wood with a screwdriver. Soft spots indicate rot. Rotted wood must be cut out and replaced before installing a new door. Water stains mean moisture has entered. Seal any leaks before proceeding.
Check that studs are straight and not bowed. Sight along the stud length. Replace badly bowed studs. Minor bowing can be shimmed during installation. Ensure all fasteners are removed and the opening is clean.
Gather these tools before starting. Missing tools mid-installation causes delays and frustration.
Professional installers also use a power drill-driver, oscillating multi-tool, and pneumatic nailer. These speed work but aren't essential for careful DIY installation.
European door frames arrive with jambs (vertical sides), head (top piece), and threshold (bottom piece). Assemble these components in your work area before positioning them in the opening.
Lay the jambs flat on a clean surface. Align the head piece at the top. Insert shims between components to hold them square.
Lift the assembled frame into the opening. Have a helper support the weight. Position the frame so it's centered in the opening with equal clearance on all sides.
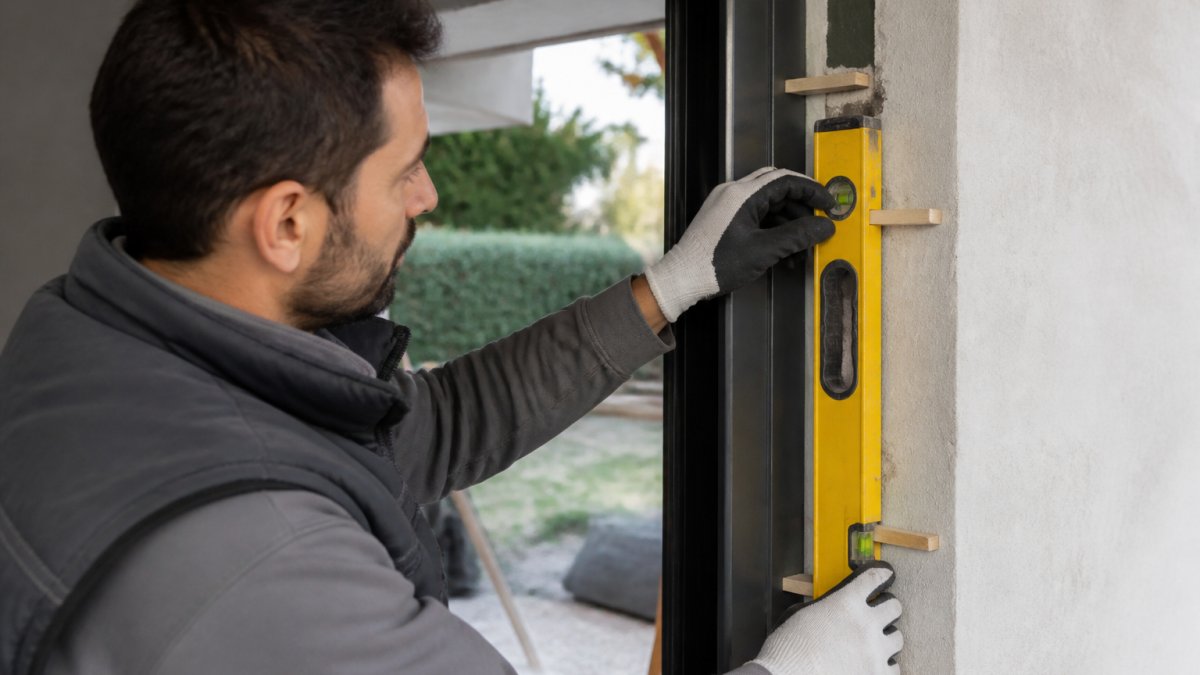
Place shims under the frame at the bottom. Use a level to check that the head is level (horizontal). Adjust shims until the level bubble stays centered. Check both sides for plumb. Add shims on the sides until both jambs are perfectly vertical.
Insert shims behind the hinges on both sides. Shims fill gaps between the frame and the studs. Push shims in from both sides until they're snug. Don't over-tighten; this bows the frame. The frame should feel solid but not forced.
Add shims at the top, middle, and bottom of each side. Verify plumb and level after each shim addition. Once the frame is perfectly positioned, drive fasteners through the frame and shims into the studs.
French doors have two panels that meet in the middle. Installation differs from single doors because both panels must align perfectly.
French doors use two hinges per panel. Assemble both panels in their frames before installation. Hang the left panel first using the same techniques as a single door. Ensure it's plumb and level.
Hang the right panel next. The right panel's left hinge must align with the left panel's right hinge. The gap between panels should be even (typically 1/8 inch). Adjust shims behind the right panel until the gap is consistent top to bottom. Tighten fasteners once alignment is perfect.
French doors have glass panels that can shift during installation. Check that glass sits evenly in the frame. Add glazing points (small fasteners) if needed to secure glass.
Install weatherstripping around the frame perimeter. European doors use rubber or silicone strips that compress when the door closes. Apply weatherstripping to the frame, not the door. The door compresses the weatherstripping as it closes. Proper weatherstripping prevents drafts and water infiltration.
Close the door and observe the gaps between the door and frame. Gaps should be even on all sides (typically 2-3 millimeters). Uneven gaps mean the frame needs adjustment.
Open and close the door multiple times. It should move smoothly without binding or sticking. Listen for squeaks or grinding sounds. These indicate misalignment or hardware problems.
Check that the door latches and locks smoothly. The latch bolt should engage without forcing. If the door doesn't close completely, the frame needs adjustment.
Current energy codes require weathersealing around all exterior doors. Use expanding foam sealant to fill gaps between the frame and studs. U.S. building energy codes for 2026 require air sealing around door frames to reduce energy loss.

Caulk the interior seam where the frame meets the wall. Use paintable caulk that matches your wall color. Caulk creates a finished appearance and blocks air leakage. Allow caulk to cure per manufacturer instructions before painting.
Apply Resisto All-Weather Flashing Tape for exterior door weathersealing ($47.90) around the exterior frame. This tape prevents water from entering the wall cavity. Overlap tape seams by 2 inches for complete coverage.
Test all locks and latches multiple times. European doors use multi-point locking systems that secure at the top, middle, and bottom. All points must engage smoothly.
Check door swing clearance. The door should open fully without hitting walls, furniture, or other obstacles.
Inspect hinges for tightness. Hinges can loosen during the first few weeks of use. Check and tighten hinge fasteners after one week, then monthly for three months.
| Installation Step | Verification Point | Common Issue |
|---|---|---|
| Frame assembly | Square corners, level top | Twisted frame causes binding |
| Frame positioning | Even gaps, plumb sides | Uneven gaps indicate misalignment |
| Shimming | Snug fit, no bowing | Over-shimming warps the frame |
| Hinge installation | Smooth operation | Misaligned hinges cause sticking |
| Weathersealing | No drafts, no water entry | Poor sealing causes energy loss |
| Hardware testing | Smooth latch engagement | Sticking latch means frame needs adjustment |
Forcing a door into an out-of-square opening damages hinges and creates binding problems.
Over-shimming behind the frame bows the jambs and causes the door to stick.
Forgetting weathersealing on exterior doors lets air and water infiltrate your walls. Seal every gap with foam, caulk, and flashing tape.
Installing hinges with incorrect fastener lengths strips threads or creates loose hinges. Use fasteners sized for your hinge holes.
Skipping the final verification step means problems emerge after installation is complete.
Installing a European door correctly takes time and attention to detail.
European door installation involves measuring the rough opening, preparing the frame, assembling the door frame components, and positioning it plumb and level using shims. Secure the frame with fasteners, install hinges and hardware, then hang the door leaf. For French doors, install dual hinges and adjust glass panels. Seal gaps with weatherstripping and foam sealant like Soudafoam to meet 2026 energy codes. The process typically takes 4-8 hours for a single door, longer for double doors.
Essential European door installation tools include a level, measuring tape, square, drill-driver, screwdriver set, hammer, shim wedges, saw, and caulking gun. Specialized items like Soudafoam spray foam ($9.99) and Resisto All-Weather Flashing Tape ($47.90) seal gaps and improve weatherproofing. A stud finder, utility knife, and pry bar help with frame preparation. Having quality hand tools prevents installation errors and ensures proper alignment.
Measure the rough opening width at three heights (top, middle, bottom) and the height at three points (left, center, right). European doors typically require openings within 1/8 inch of the door frame dimensions. Check that the opening is plumb (vertical) and square using a level and square. Account for shim space (typically 1/2 inch on each side) when ordering. Verify existing frame condition before ordering a prehung door set or door leaf.
Yes, you can install a European door in an existing opening by choosing between a prehung door set (frame included) or a door leaf alone. For existing frames, a door leaf with new hinges and hardware works if the frame is square and plumb. If the existing frame is damaged or out of square, remove it entirely and install a new European door frame. This approach ensures proper alignment, weatherproofing, and compliance with 2026 energy codes.